


Materials:
Tiles of desired color
Hammer
Spray Polyurethane
Paint brush
Painters tape
Paper
Bowl of Water
Process:
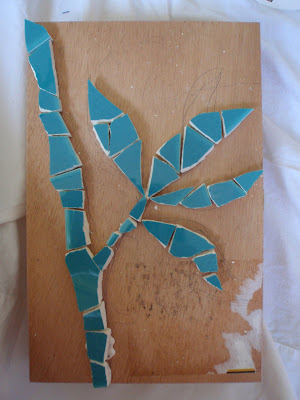
Step 1. Sketch a design on the top of your cigar box with pencil. Keep it relatively simple if this is your first mosaic. I chose a simple 2 color design for mine.
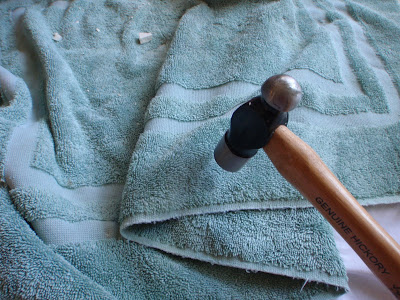
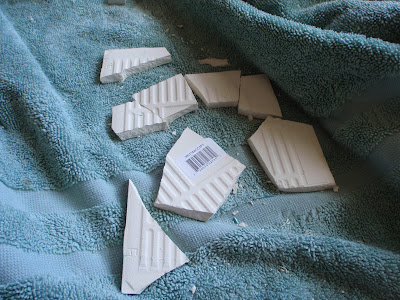
Step 2. Cover the tiles with a towel and hit them with a hammer to break them into pieces. For smaller pieces you can use a tile cutter, but keep in mind the eges will not be as smooth as when you use the hammer.

Step 3. Select a portion of your design to begin with and fill it in with tile pieces. I suggest not gluing them at first so you can make adjustments.
This part is like a puzzle. You will need to make adjustments to the tiles along the way to get them to fit together nicely. The tile cutter really comes in handy for trimming the pieces just how you want them.
Step 4. Once laid out, remove a piece, apply a dab of glue, and replace. Repeat until done with this portion of the design. The gap you leave between the tiles is up to you, but even with a small gap, you will leave a nice amount of grout showing.
Step 5. Repeat Step 3 & 4 with the back-ground tiles. You can glue the peices along the way, but be sure to work from one side of the box to the other so as not to paint yourself into a corner. When finished, let dry over night.

Step 6. Apply a generous amount of grout to your tiles. We mixed ours with grey paint to provide nice contrast with the colors our tiles. Work the grout into the cracks by wiping a plastic knife or palette knife across the surface.
 Step 7. Wipe tiles with damp sponge to remove excess grout. Then use a damp paper towel to get off the remaining residue.

Step 8. Tape off your tiles with paper and painter's tape and spray paint the outside of box. We chose white to match the tiles. I used a paint brush to paint the inside green to match the green bamboo.

Step 9. While still masked, spray the box with a coat of protective polyurethane if desired, let dry and then remove masking to reveal your new mosaic'd box!

Thanks for the great tutorial Jess!


2 comments:
Beautiful work!! hard work is required for this.
Great creative work.
The Sigma Tile Cutter reviews can also be helpful when it comes to your choices for buying one. The most important factor when you're trying to buy one is safety. Discover here to know more about best tile cutter.
Post a Comment